
Sound designer Sergio Ronchetti of Double Jump Audio recently put together a video walkthrough demonstrating how he uses atmoky trueSpatial in his FMOD workflow. Having worked on projects like Morbid Metal and Eldest Souls, Sergio knows first hand how important accurate 3D implementation is when the mix needs to stay clean and audible while still giving players depth and immersion.
This blog post covers the same ground as the video, reworked for reading and expanded with additional detail on signal flow, bus setup, and features not covered in the video.
📺 Watch the full video walkthrough: [https://youtu.be/r858ePGBfqw?si=PkGIMYxiA3LlLi9N] Best experienced with headphones.
The Baseline: What FMOD Gives You Out of the Box
Let’s say you’re adding a 3D Event to your game. You’ve designed the sound asset and now you’re putting it into your FMOD Studio project. You create a 3D event, and immediately you get automatic left/right panning and volume adjustment based on distance to the player. That’s a solid starting point.
But once that’s working, the questions start piling up:
What if the player is standing in front of or behind the sound source? What if there’s an obstacle between them? What if the sound is above or below? How can you be accurate with direction and shape the sound to match? How do you make sounds feel close without just turning up the volume?
If you’re asking these questions, you’re already thinking beyond the basics. You’ve moved past panning and distance rolloff, and you’re looking at the full picture of spatial immersion.
atmoky trueSpatial: The Plugin Suite
atmoky trueSpatial is a set of four plugins for FMOD:
The Spatializer renders audio objects in 3D space with built-in support for source directivity, occlusion, and near-field effects. The Renderer converts any input format to any output format, with downmixing filters that can simulate height and rear channels even on stereo or basic surround setups. The Externalizer counteracts the “inside the head” effect that comes with binaural playback over headphones. And the AmbisonicRenderer takes first-order ambisonics input and renders it to binaural, which is useful for ambience beds or environmental recordings.
All four plugins support output formats from binaural stereo up to 7.1.4, and you can switch between them at runtime without additional routing or scripting.
This post (and the video) focuses primarily on the Spatializer and Externalizer, but we’ll also touch on how the Renderer and AmbisonicRenderer fit into the overall signal flow.
Swapping in the Spatializer
On any 3D Event in FMOD Studio, you replace the default FMOD Spatializer with the atmoky Spatializer (via Add Effect > Plugin Effects > atmoky).
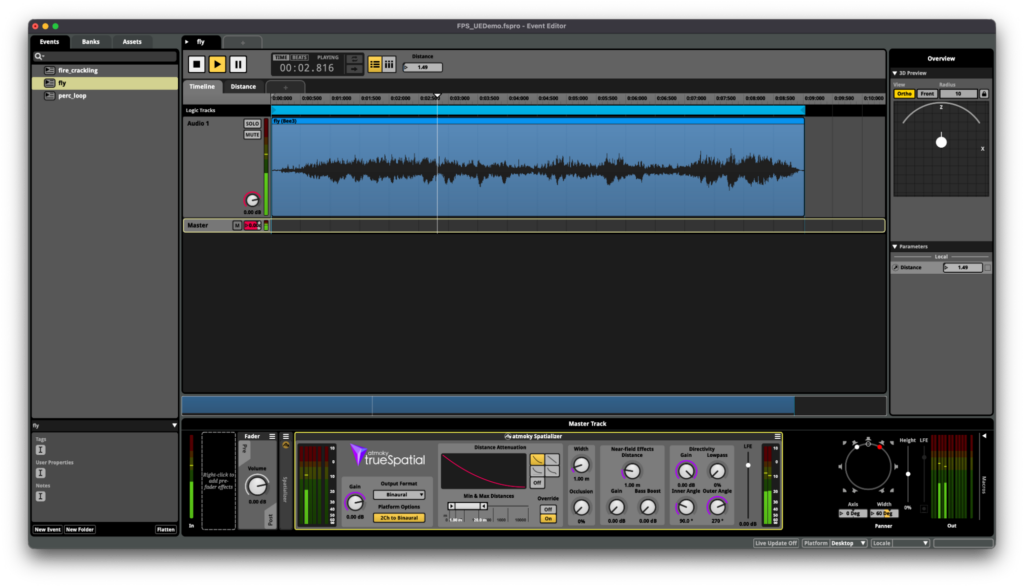
The first thing you’ll notice is the output format dropdown. The Spatializer can render to binaural (for headphones), stereo, or any channel-based surround format. There’s also a “Platform” option, which reads the output format from a runtime setting, so you can let the player choose between headphones and speakers without needing separate event configurations. More on that in the signal flow section below.
What Is Binaural Rendering, and Why Does It Matter Here?
Binaural audio reproduces 3D sound through regular stereo headphones. It works by modeling how sound reaches our two ears differently, taking into account that we have a head between them, that our ears are shaped a certain way (the pinna), and that all of this shapes the way we perceive direction and distance.
Instead of spreading a sound across discrete speaker channels (which is usually just horizontal), binaural rendering treats the sound source as an object in full 3D space. Direction, elevation, and distance are all encoded into the stereo signal.
This distinction matters in practice. With standard channel-based panning, a sound source at 45° to the right goes to the right speaker (or right ear). But what about a sound directly in front vs. directly behind? Both sit at the center of the stereo field, and without additional processing there’s nothing to tell them apart. Binaural rendering solves this: it applies the frequency shaping (the HRTF, or Head-Related Transfer Function) that our ears would naturally impose on sounds from different directions, so front, back, above, and below all sound distinct.
And unlike static binaural recordings, the rendering in trueSpatial is fully dynamic. It responds to the game’s 3D coordinates in real time. In the video, Sergio demonstrates this with a deer sound source, moving around it in the game build to show how the binaural positioning tracks naturally across all directions.
One thing worth noting: binaural rendering does change the timbral character of a sound. That’s intentional. The timbral differences are the spatial information. Our pinnae (outer ears) naturally filter sound differently depending on where it comes from, and removing those timbral cues would collapse the 3D image back to flat stereo. If a binaurally rendered sound has a slightly different color than the raw mono file, that’s the spatial encoding doing its job.
Source Directivity: Shaping How Sound Radiates
In the real world, sound sources don’t radiate equally in all directions. A person speaking projects sound mostly forward, and the further you move behind them, the more muffled and attenuated it becomes.
The atmoky Spatializer includes a Directivity section that lets you recreate this behavior. There are four parameters:
Inner Angle defines the cone in front of the emitter where sound is at full level. Outer Angle defines the wider cone beyond which the sound is attenuated. Gain controls how much the sound is reduced outside the outer angle (from 0 dB down to -80 dB). Low-Pass applies a filter to sounds outside the outer angle, simulating the way high frequencies are naturally absorbed when a source isn’t facing you.
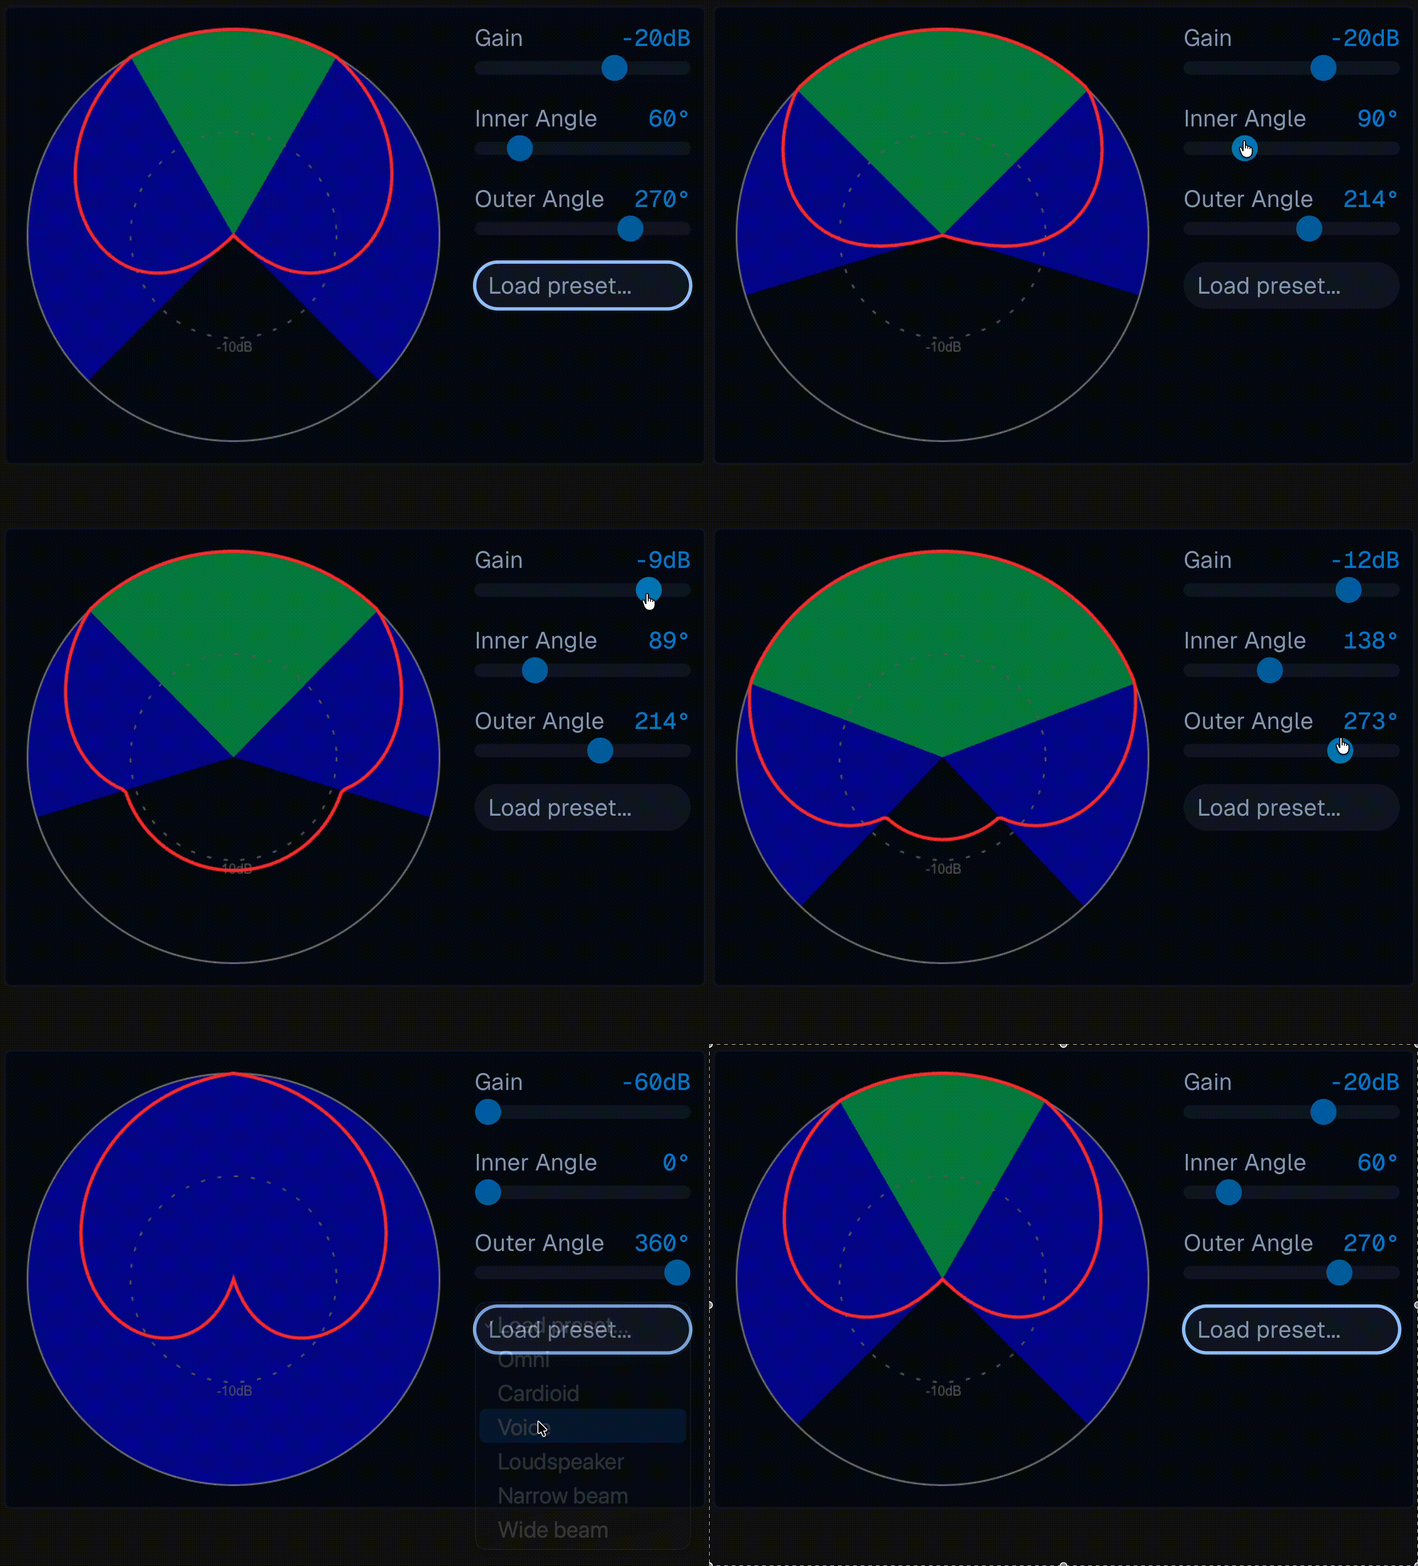
The combination of gain reduction and low-pass filtering is what makes directivity feel natural rather than abrupt. A hard volume cut when you step behind a source sounds artificial. But reducing the level slightly while also rolling off the highs mimics how real acoustic sources behave: you can still hear a speaker from behind, but the sound is duller and quieter.
The documentation includes several directivity presets that can serve as starting points: Omni (no directivity at all), Cardioid, Voice, Loudspeaker, Narrow Beam, and Wide Beam. These give you a sense of how the inner/outer angle and gain/low-pass parameters interact for different source types.
This comes up in all sorts of gameplay contexts. Busy combat sequences where you need to tell apart approaching sounds from retreating ones. Stealth games where the player eavesdrops on a conversation and needs to hear the difference between facing a speaker and standing behind them.
In the video, Sergio demonstrates this with a wolf: he sets the inner angle to about 100° and the outer angle to around 200°, then walks around the source to hear the presence and clarity change. Adding a low-pass filter at 30% and reducing the directivity gain makes the difference even more pronounced.
Source Occlusion
The Spatializer also exposes an Occlusion parameter (a value between 0 and 1) that simulates a sound source being blocked by an obstacle. At 0 there’s no occlusion; at 1 the source is fully occluded.
The parameter itself is straightforward, but the interesting part is how you drive it. In a game engine, you’d typically use raycasts or a custom occlusion system to determine whether there’s geometry between the listener and the source, and then feed that value to the plugin. The trueSpatial Unity integration includes a built-in occlusion system that handles this automatically using occlusion probes, so you don’t have to write the raycast logic yourself. For Unreal Engine, you can drive the parameter through Blueprints or C++.
The occlusion effect is gradual: partial values between 0 and 1 give you smooth transitions rather than binary on/off switching, which is important for situations where a player moves behind a wall or a door closes over time.
The documentation includes several directivity presets that can serve as starting points: Omni (no directivity at all), Cardioid, Voice, Loudspeaker, Narrow Beam, and Wide Beam. These give you a sense of how the inner/outer angle and gain/low-pass parameters interact for different source types.
This comes up in all sorts of gameplay contexts. Busy combat sequences where you need to tell apart approaching sounds from retreating ones. Stealth games where the player eavesdrops on a conversation and needs to hear the difference between facing a speaker and standing behind them.
In the video, Sergio demonstrates this with a wolf: he sets the inner angle to about 100° and the outer angle to around 200°, then walks around the source to hear the presence and clarity change. Adding a low-pass filter at 30% and reducing the directivity gain makes the difference even more pronounced.
Elevation: Hearing Height
One of the most underserved areas in game audio is vertical positioning. Standard panning handles left/right well, and rolloff handles distance, but sounds above or below the listener often lack any meaningful spatial distinction.
With binaural rendering, elevation is encoded naturally through the HRTF. Our pinnae filter high frequencies differently depending on whether a sound arrives from above, below, or at ear level, and binaural rendering reproduces these cues.
In the video, Sergio walks under a bell mounted on a gate and looks up. The sound positions itself above the player, blending with the ambisonics ambience layer while retaining its precise directional identity. This kind of vertical awareness is hard to achieve with horizontal-only panning, but it comes naturally with binaural rendering because the spatial information is already encoded in the filter.
Near-Field Effects
When a sound source is far away, we mostly care about direction. But when something is right next to our ears, the acoustics change. Lower frequencies get naturally amplified, the level differences between ears increase, and there’s a distinct sense of physical proximity that has nothing to do with just being “louder.”
This happens because at close range, the distance between our two ears becomes significant relative to the distance to the source. The sound arriving at the near ear and the far ear differs more in both timing and level, and the head shadow effect becomes more pronounced. It’s why a whisper in your ear feels so different from someone speaking quietly a few meters away.
The atmoky Spatializer has a Near-Field Effects section with three controls:
Distance sets how close the listener must be before the near-field processing kicks in. Gain adds an automated volume boost for close sources. Bass Boost amplifies low frequencies to simulate that sense of intimacy (since low frequency amplification is one of the physical characteristics of near-field sources).
In the video, Sergio uses a swarm of fireflies to demonstrate this, each one a small object with its own looping Event in FMOD. With the near-field gain set to around 8 dB and bass boost at 7 dB, the flies feel like they’re buzzing right against your skin as they pass close to the listener.
One thing to watch for: with near-field effects enabled, close sources will be boosted and can clip. It’s worth adding a compressor or limiter downstream, or adjusting your overall levels to account for it.
Tip: For a deeper look at the physics and perception behind near-field audio, we wrote a dedicated article on the topic: When Sound Gets Close.
The Externalizer: Getting Sound Out of Your Head
If you’ve worked with binaural audio over headphones, you’ve probably experienced the “inside the head” problem. The sound is directional, but it feels like it’s happening between your ears rather than in the space around you.
This is a well-known limitation of headphone playback. In real life, we hear sounds in rooms. Reflections, even subtle ones, give our brain cues about the distance and position of sound sources in space. Headphones remove all of that. The direct signal arrives at our ears without any room interaction, so the brain has nothing to anchor the sound to an external position. The result: everything localizes inside the head.
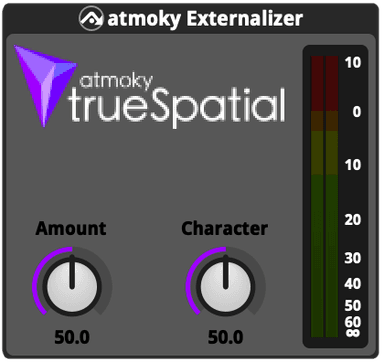
The atmoky Externalizer plugin is designed for exactly this. It adds a subtle sense of space to the binaural signal so that sources are perceived outside the listener’s head rather than between the ears.
It has two controls: Amount (0 to 100, how much externalization to apply) and Character (which shapes the tonal quality of the effect, from warmer to more airy). At 0, the Externalizer is fully bypassed.
In the video, Sergio adds the Externalizer alongside the Spatializer on the firefly events, and the difference in perceived “presence” is noticeable. The sounds move from sitting inside the headphones to sitting in the scene.
Which Plugin for Which Job
So far, this post has focused on the Spatializer. But the trueSpatial suite has four plugins, and understanding when to use which one comes down to a simple question: what kind of source are you working with, and how should it relate to the listener’s position?
A 3D point source (mono or stereo): Spatializer
This is the most common case. A gunshot, a voice, a footstep, an ambient object like a torch or a beehive. You have a mono (or stereo) asset placed at a position in 3D space, and you want the player to perceive its direction, distance, and height.
The Spatializer replaces the default FMOD Spatializer on the event. It renders the source to binaural, stereo, or any surround format, with all the features covered above: directivity, occlusion, near-field effects, distance attenuation. This is the workhorse.
Worth noting: the Spatializer is currently the only option in FMOD for true full-sphere 3D spatialization. Routing through a channel-based format like 7.1.4 limits spatial resolution to the speaker positions in that layout, and it misses the entire half-sphere below the listener entirely. The Spatializer renders each source as a 3D object directly, so direction, elevation (including below), and distance are all encoded with full accuracy.
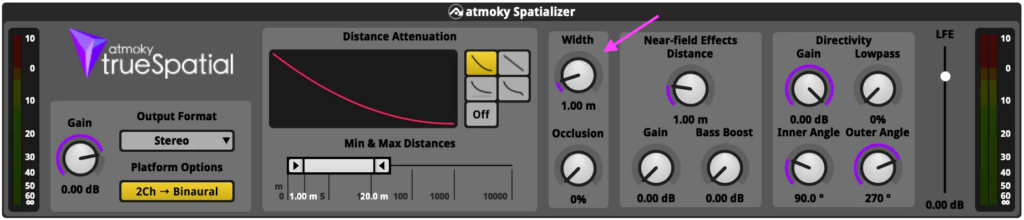
A multi-channel source as a virtual speaker rig: Spatializer with Width
This is where it gets interesting. Say you have a 5.1 music stem or a surround ambience loop, and you want to place it as an object in the game world. Think of a jukebox playing a 5.1 mix, or an in-game cinema screen with surround sound, or an outdoor concert stage.
The Spatializer handles this too. When you feed it a multi-channel input, the Width parameter controls how the channels are arranged around the source position. Each channel gets placed on a virtual sphere as if it were a loudspeaker in a physical setup. From far away, the whole thing collapses to a single point source: you hear the jukebox as one object in the distance. As the listener approaches and enters the virtual speaker rig, the individual channels start to separate and you perceive the original surround panning. It’s a smooth transition controlled by the Width value and the listener’s distance.
For stereo input specifically, the left and right channels are placed at ±90° (rather than the standard ±30° of a stereo speaker pair), which gives a wider spread and avoids the narrow image you’d get from placing two virtual speakers 30° apart at a distance.
Multi-channel content without 3D positioning: Renderer
The Renderer is not a spatializer. It doesn’t add 3D positioning, distance attenuation (of course you can manually add an attenuation curve by simply assigning a distance automation to the tracks volume slider), or directivity. What it does is render any input format to any output format, including binaural. That makes it a different tool for a different job.
A music score, a narrator’s voice-over, UI sounds: these don’t need to be placed as objects in 3D space. But they still benefit from being rendered properly for the listener’s playback setup. If the player is on headphones, you probably want a 5.1 music mix binauralized rather than simply folded down to stereo. The Renderer handles that. It takes the channel layout, renders it to binaural with proper spatial positioning of each channel, and responds to listener rotation. So it’s not just a downmixer or a passthrough: it’s an active renderer that preserves the spatial intent of the original mix for headphone playback.
Tip: When downmixing to formats with fewer channels (say from 7.1.4 to stereo for speakers), the Renderer provides height and rear filters that simulate the presence of channels the playback system doesn’t have.
First-order ambisonics beds: AmbisonicRenderer
If you’re working with first-order ambisonics (FOA) recordings for ambient soundscapes or environmental audio beds, the AmbisonicRenderer handles these. It takes a 4-channel ambix input (ACN channel order, SN3D normalization) and renders it to binaural.
By default, the AmbisonicRenderer responds to listener rotation, so the soundfield stays anchored to the world: turn your head and the scene stays in place. If you want the opposite behavior (for example, a non-diegetic ambience layer that should follow the listener’s head rather than the world), you can enable Headlocked mode, which makes the rendering independent of listener rotation.
The AmbisonicRenderer also has its own Distance Attenuation section with the same controls as the Spatializer (type, min distance, max distance). This means you can place an ambisonics bed as an object in the game world and have it attenuate with distance.
Tip: As you have two different ambisonics ambience scenes (say a forest and a cave), each placed at a position in the level. As the player moves between them, the distance attenuation on each AmbisonicRenderer handles the crossfade naturally. Walk away from the forest, it fades out. Approach the cave, it fades in. No scripted volume automation needed.
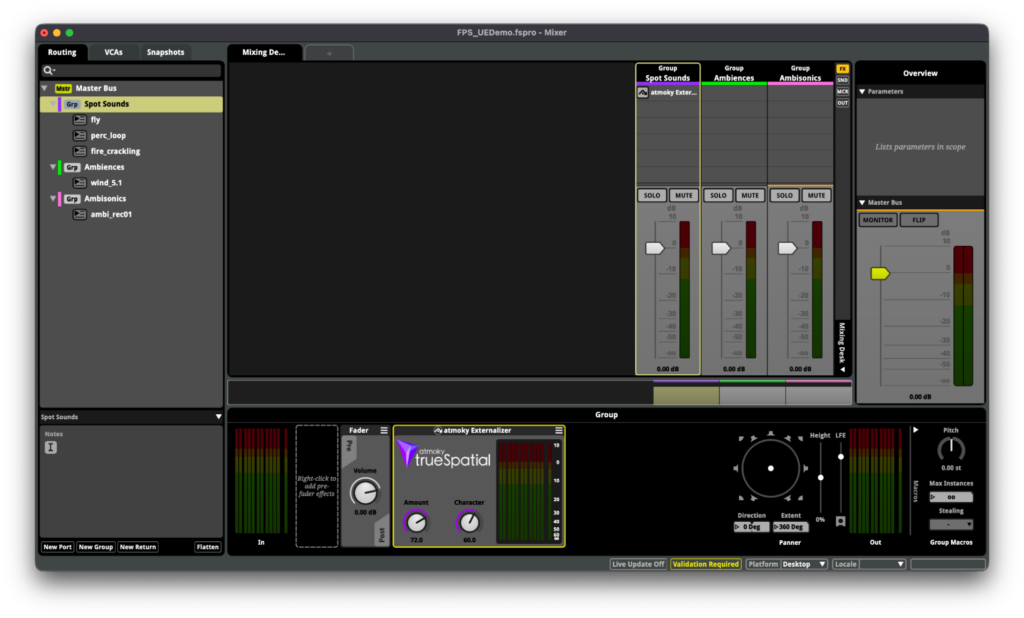
Externalizer: one instance on a group bus
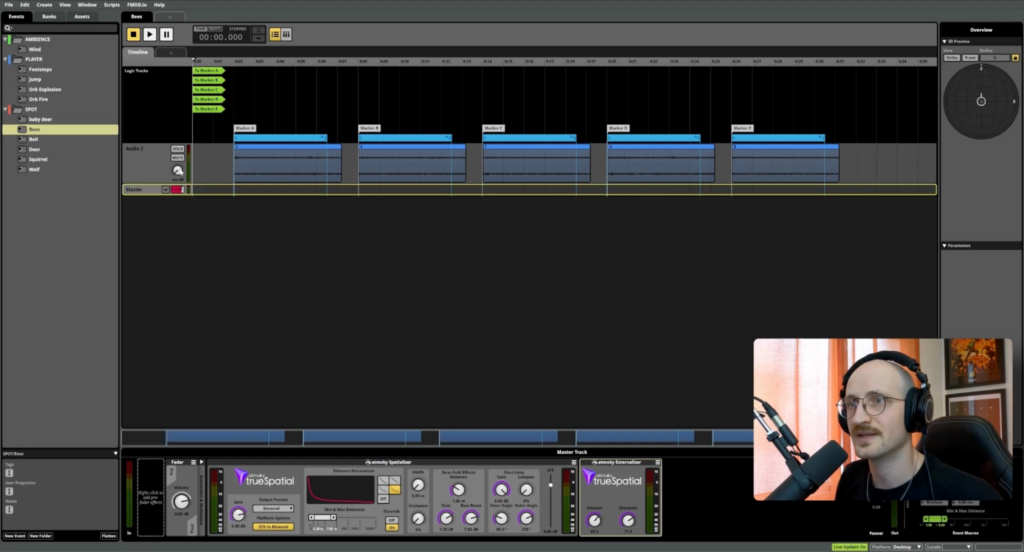
The Externalizer is not a rendering plugin. It’s a post-processing effect that gives you this “out-of-head” feel on headphones. It either goes on a Single Event or on a Group Bus. Route all your spatialized binaural events (from any of the rendering plugins above) into a shared bus, put one Externalizer on it, and you get consistent externalization across your entire spatial mix with a single point of control.
Already have a project? Drop-in binaural with one plugin.
Everything above describes building spatial audio from the ground up: Spatializer on events, AmbisonicRenderer on beds, Externalizer on a bus. But what if your entire FMOD project is already set up and mixed in a channel-based format like 7.1.4, and you just need headphone output?
Tip: Place a single Renderer on the master bus. Set the master bus format to 7.1.4 (or whatever your project is mixed in). The Renderer converts the final mix to binaural. Everything upstream stays untouched.
This won’t give you per-source object-based rendering (for that you’d use the Spatializer on individual events), but it gives you a proper binaural rendering of your entire surround mix with correct channel placement and headphone optimization. One plugin, one bus, binaural output. The quickest path when you need headphone support and the project timeline doesn’t allow for a full spatialization rework.
Integration
Runtime Output Format Switching
All of the trueSpatial plugins support a “Platform” output mode. When set to Platform, the plugin reads the current output format from a shared runtime setting (the Platform Format API). This means you can expose an audio output setting in your game’s options menu (headphones / stereo / surround) and all the trueSpatial plugins will adapt automatically, without needing separate event configurations, additional bus routing, or engine-side scripting.
For example: a player switches from speakers to headphones mid-session. The Platform Format changes from 5.1 to Binaural. Every Spatializer, Renderer, and AmbisonicRenderer instance adapts. One setting, one change, the entire mix follows.
The Output Format Selection Guide in the documentation covers this in detail.
Game Engine Integration
On the engine side, the trueSpatial plugins work with the standard FMOD integrations for Unity and Unreal Engine. You install the plugin binaries alongside the FMOD plugin, set up your events in FMOD Studio, and everything carries over when you build banks. No additional engine-side scripting is needed for the core spatialization features.
The Unity integration also includes a built-in occlusion system that drives the Spatializer’s occlusion parameter using occlusion probes in the scene. This removes the need for writing your own raycast-based occlusion logic.
Putting It All Together
FMOD’s built-in spatializer covers the fundamentals well, and there are other solid approaches to 3D audio out there. The features covered here (binaural rendering with HRTF-based elevation, source directivity with low-pass filtering, occlusion, near-field simulation, externalization, multi-channel source spatialization, runtime format switching) address the stuff that comes after the basics are sorted: the questions about front vs. back, above vs. below, close vs. far, occluded vs. direct that don’t have obvious answers with horizontal panning alone.
The routing stays inside FMOD Studio: Spatializer on 3D events (including multi-channel sources with Width), Renderer on non-positional content, AmbisonicRenderer on FOA beds, Externalizer on a shared group bus. On the engine side, you use the standard FMOD integration and drive parameters like occlusion from your game logic.
Try It Yourself
trueSpatial comes with a free trial and demo scenes, so you can hear everything covered here for yourself.
Documentation and downloads:
Supported platforms: Windows, macOS, Linux, iOS, visionOS, Android, PlayStation 4 & 5, Xbox, Switch and Switch 2. Requires FMOD 2.02 or newer.